Remiel's Woodworking
Adventure
Posted on: 10/20/2024 15 minute read
Introduction
Hey everyone! It’s been a hot minute since my last blog update. Lately this year, I’ve been doubling down on woodworking.
It’s a relaxing hobby and I enjoy every aspect of it: the smell of wood, handling the wood, and utilizing the final product.
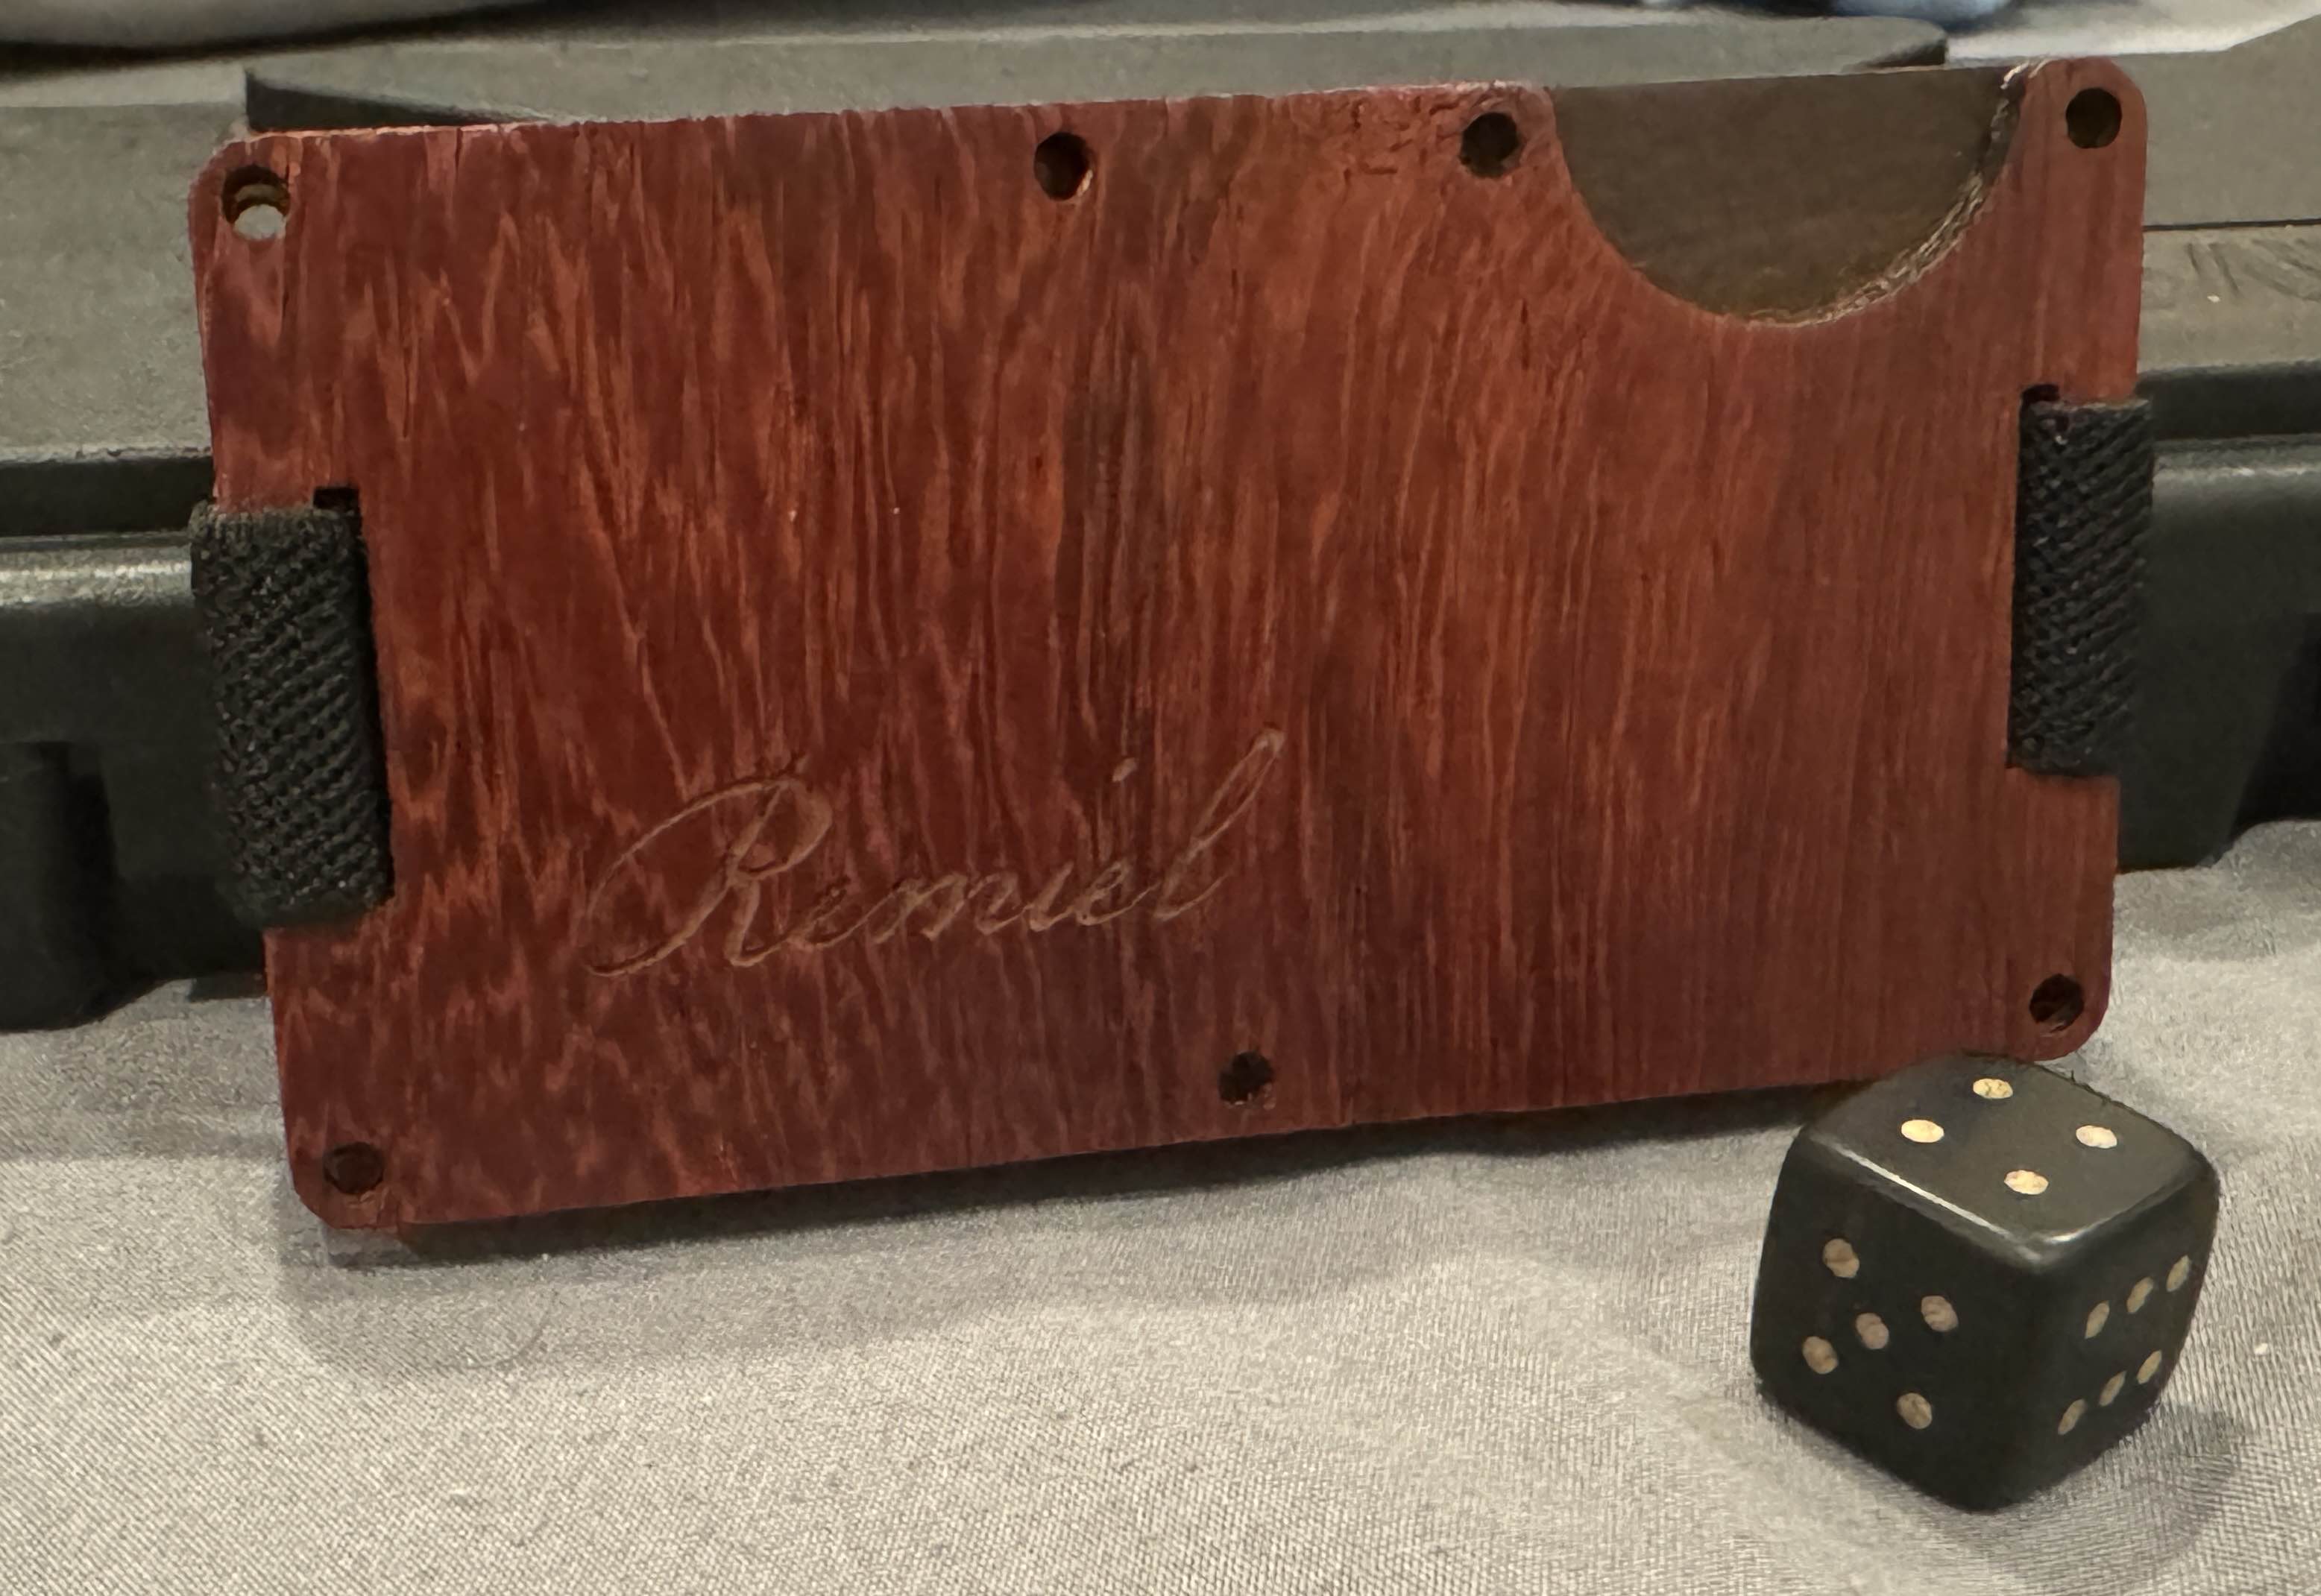
In this blog post I’ll be going over two of my newest projects: a ridge wallet and a 16mm dice.
I will also be sharing details like reputable woodworking vendors and opening up a little commission store for my projects as well as some bulk order surplus woodworking goods.
This is a loooooooong blog so here's a table of contents to help you navigate:
Table of Contents
- - Wooden Ridge Wallet
- - Ebony Dice
- - Conclusion
- - Storefront
- - Ebony CUT 2mm: 8mm/s - 40% max power - 40% min power
- - Ebony ENGRAVE (light): 400mm/s - 8% max power - 8% min power - .05 mm interval
- - Padauk ENGRAVE: 200mm/s - 6% power max - 6% min - .025mm interval
- - Hinoki CUT 3mm: 40mm/s - 20% max power - 20% min power
- - Sandpaper kit (120-10,000) 75x50mm 2x per grit <300 NT>
- - Duragold Tack Cloth <100 NT>
- - Electrical tape <120 NT>
- - N35 10x1 Magnets <5 NT>
- - A kiss from atmos (FREE, Swing by (comes with salmonella)!)
psst! you can click on these to jump to the section
Wooden Ridge Wallet
Why a ridge wallet?
The first thing that comes to mind, is why? Why a ridge wallet?
A ridge wallet is an easy beginner cad project, it is one of the most recommended practices for learners.
For if you could cad a ridge wallet, you could practically cad whatever you’d like.
Funny thing, I’ve never actually gotten to cadding a ridge wallet until recently when I invited a dear friend of mine to a CAD race.
Since a ridge wallet is an easy CAD, we raced to see who could cad the best one in under twenty minutes.
Needless to say, I won. 😎😎😎 (Props to him though, mine didn’t have a clip or say “Ridge” on it).
By making one of these, I join the long line of TAS CADDERS and kept the tradition alive with my own spin.
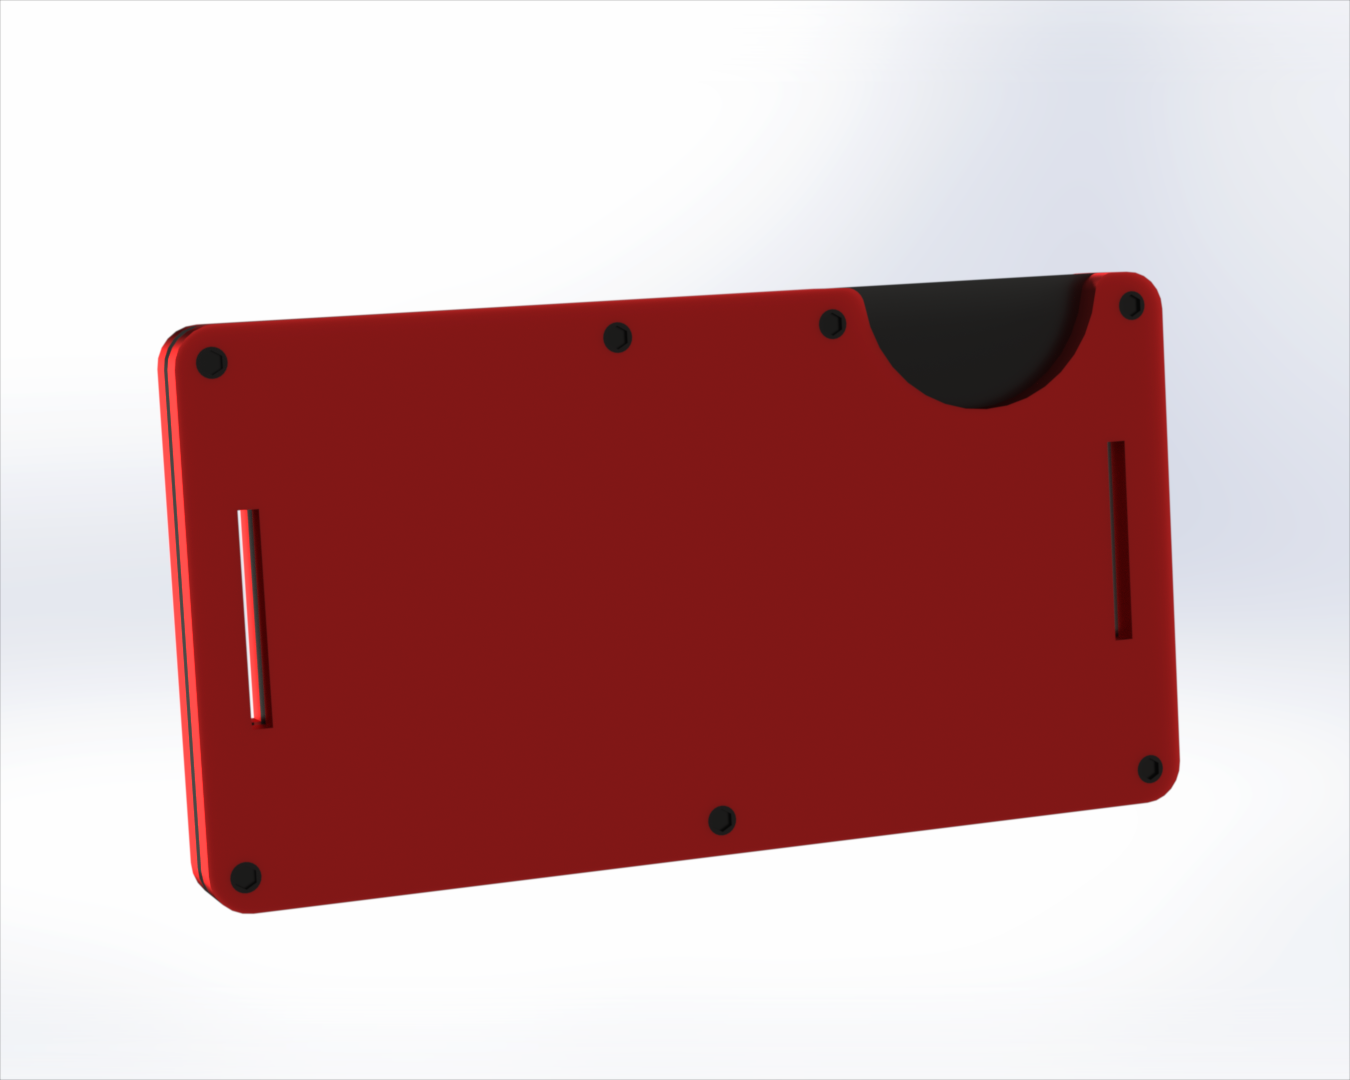 With the cad, I now have the DXF files I need to send to the lasercutter.
The Wood
For the wood choice, I decided to use ebony and padauk. Both of these are African hardwoods with Ebony being known as one of the hardest in the world. Ebony provides a beautiful dark shade whilst padauk gives me the bright red shine I need. This matches up with the cad and I’m left with a red and black color contrast; subjectively, I think would look amazing.
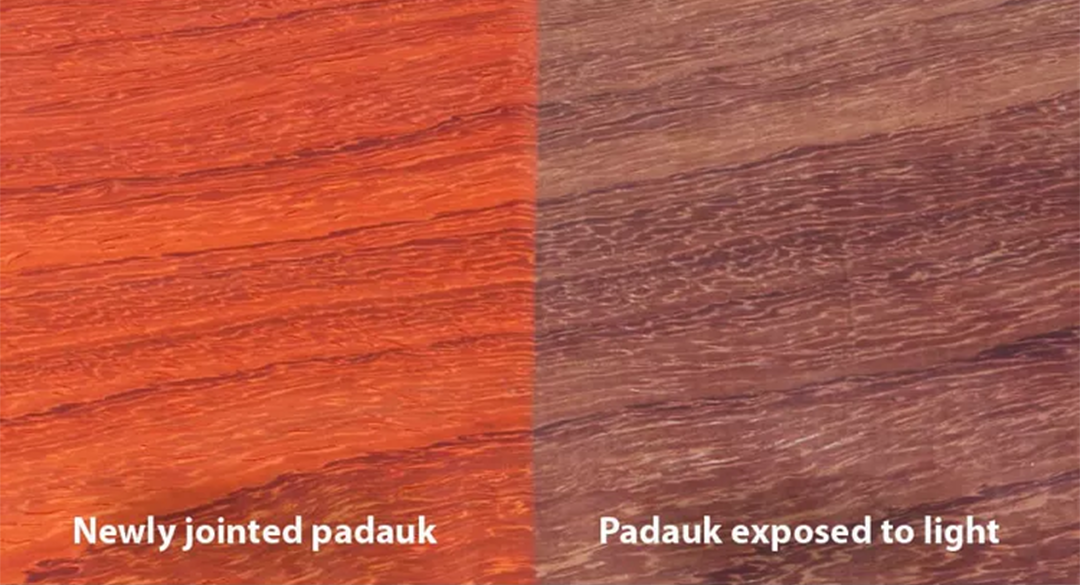
Unfortunately though, Padauk is one of those woods that darken over years as it is exposed to UV rays.
Cutting and Planing the Wood
My school has a sawstop. I chose not to use the sawstop in lieu opting for a very old, rusty, high error, WASTEFUL and HAZARDOUS miter saw. The woodworking dust collector doesn’t even properly attach to the miter saw! I am not proud of this decision, I wasted a lot of very good wood in this manner because unintentionally angled cuts from the miter saw eat up more wood than I need. I will not be using a miter saw again, a tablesaw is so much more precise and so much safer. Anyhow, since I used the miter saw, nothing about my wood cuts were flat. Therefore I had to extensively utilize the planer to flatten the wood (both ebony and padauk) to 2mm. This was very upsetting for me and a VERY expensive lesson on using the right tools for the job.
Lasercutting
Optimal cutting and engraving data for ebony and padauk do not come easy.
Every lasercutter is slightly different in some way, so unless someone has an identical model and shares their lasercutting settings you will have to tinker.
Which is what I did because “optimal” laser cutting settings online are not optimal for me.
Areas for consideration include hardness and thickness, with thicker and harder woods requiring both more power and slower cutting speeds.
Tuning requires you to balance these variables so that you cut the wood well whilst not burning the wood.
The issue? Ebony is RICH with OIL.
So you need high power to cut the super hard wood, BUT if your power is too high, then you will ignite the oil within the wood causing small fires and chars.
Charring the wood is horrible because it makes the wood fragile resulting in snapping when force is applied.
Eventually though, I tuned the laser cutting settings to perfection. After… 2 hours…
For a 110W Lasercutter, optimal lasercutting settings with the lasercutter nose 8mm from the wood are:
Sanding and Finishing
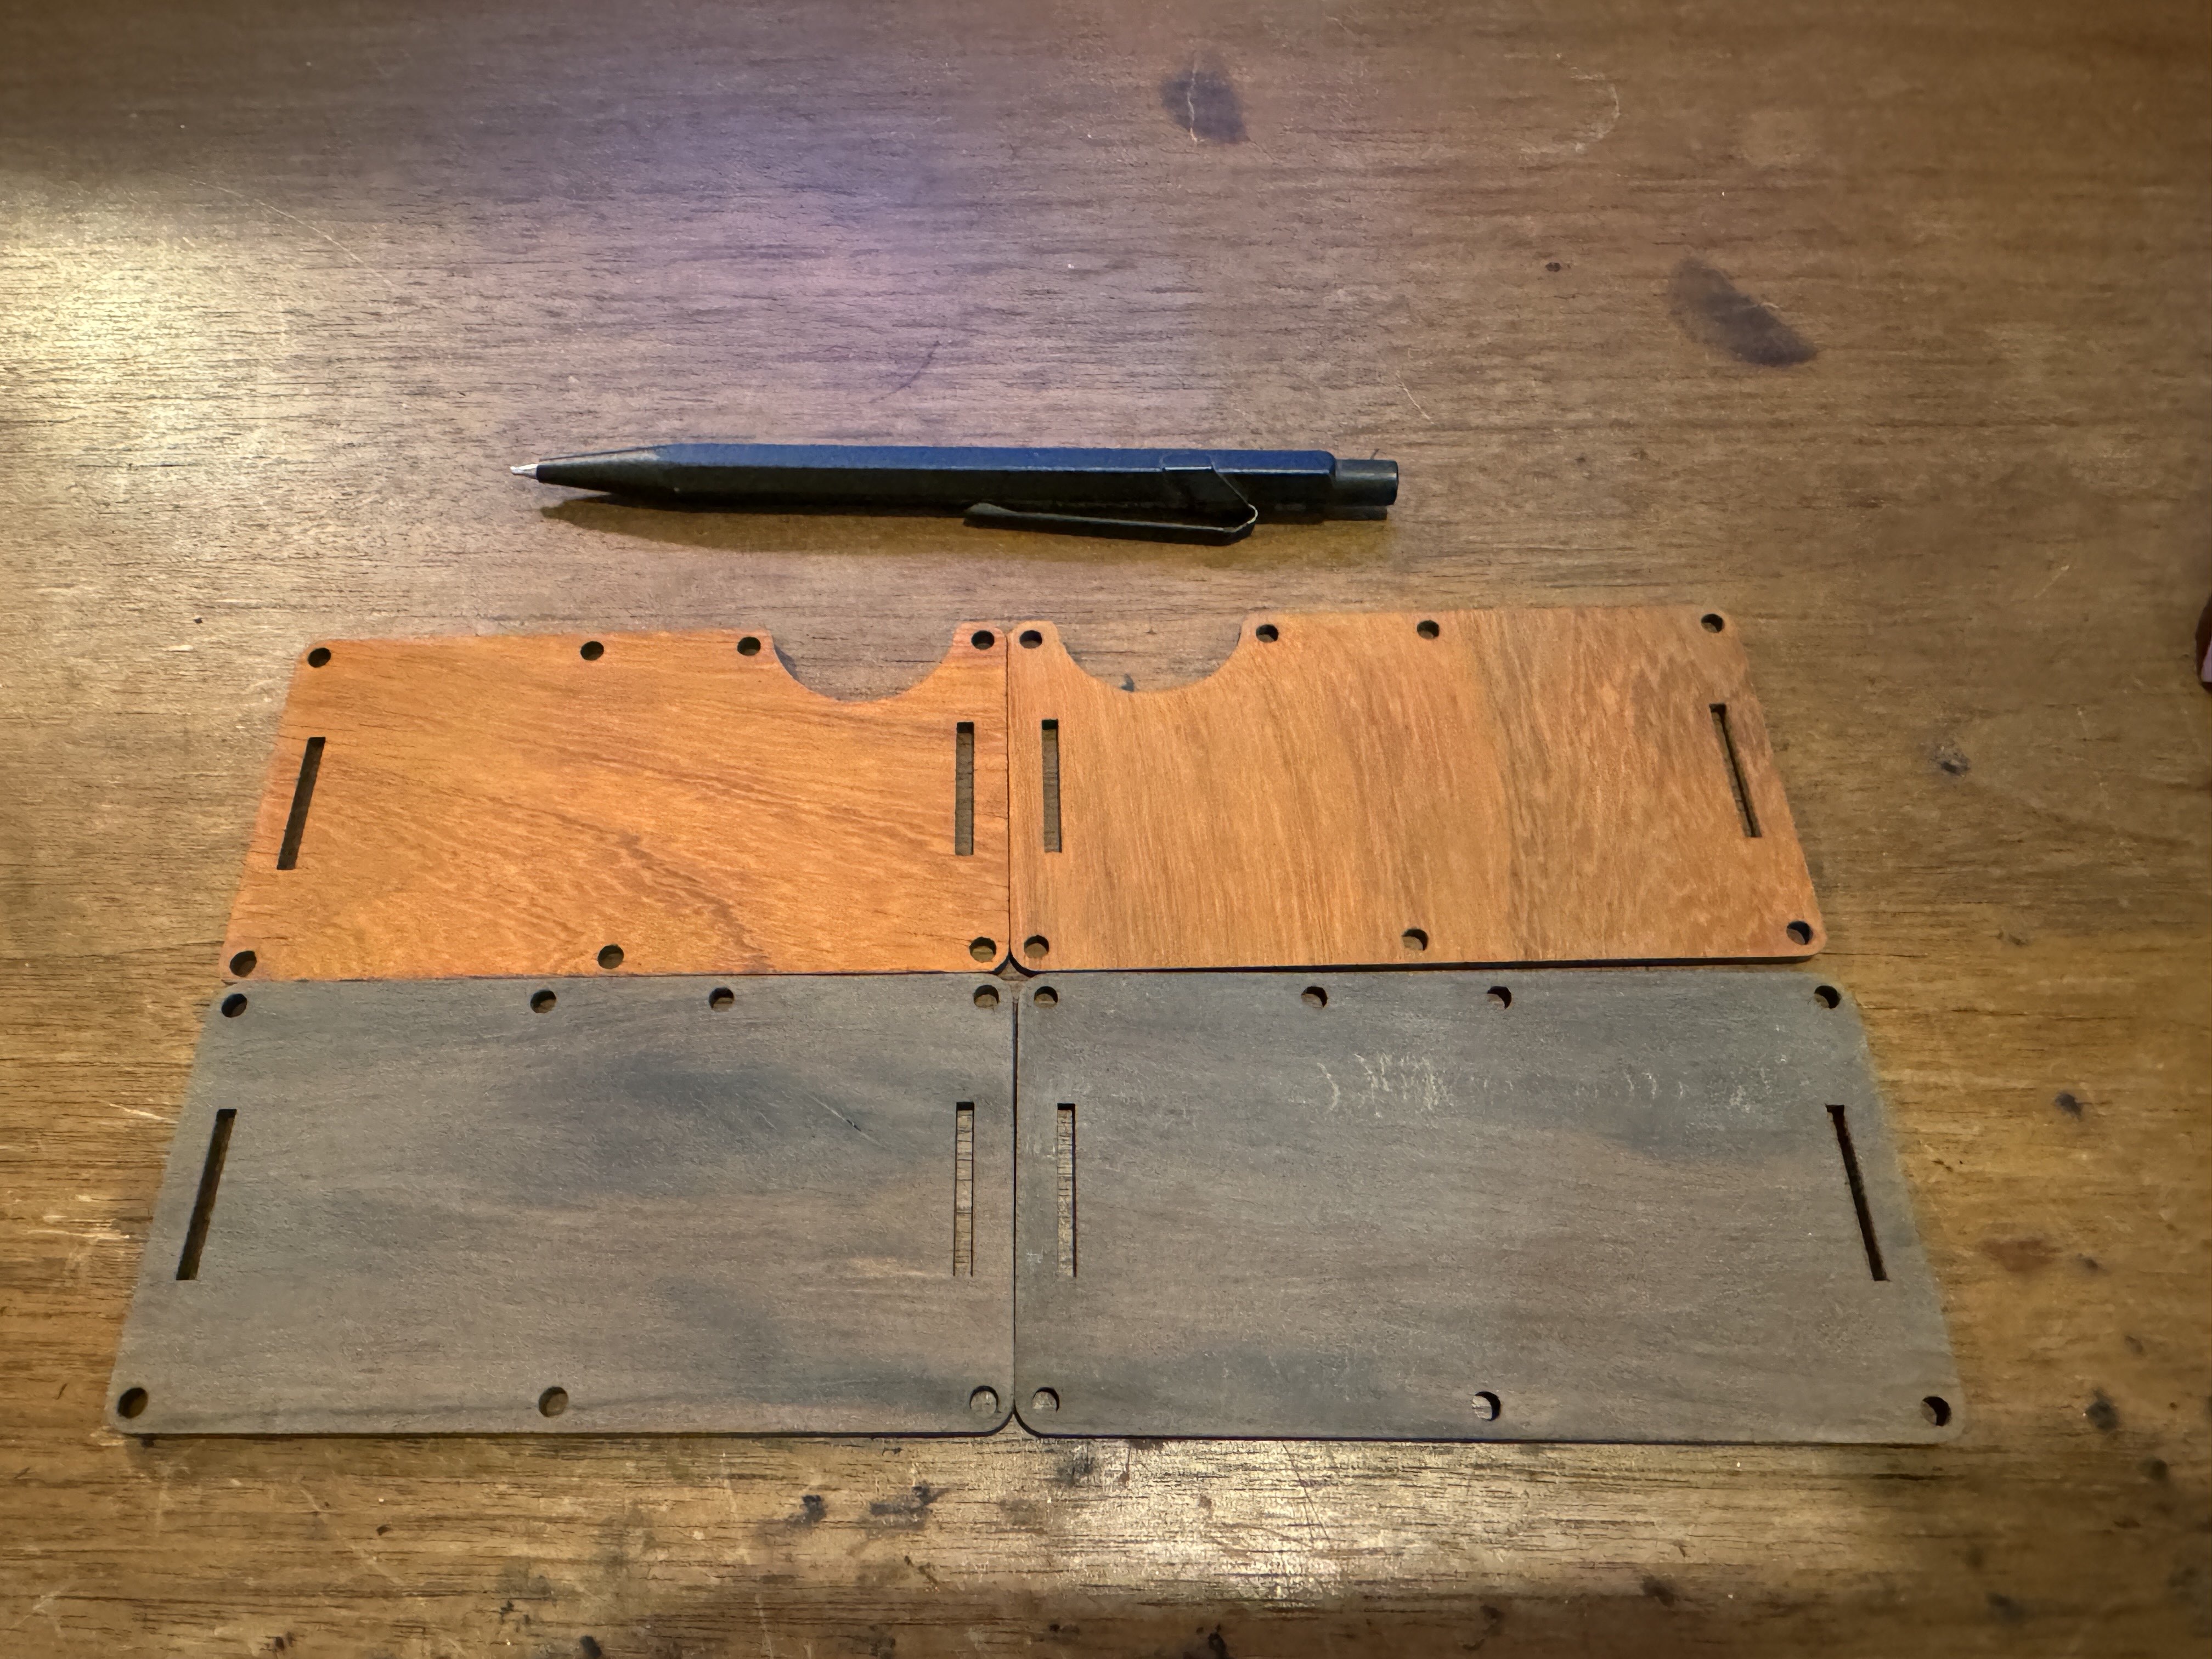 The sanding sequence I underwent for the ridge wallet was 120 -> 150 -> 220 -> 320 -> 400.
After this I tried to give it a 0000 (fineness rating) steel wool finish.
Call me a genius but I discovered that scrubbing a handful of hard metal strands on a wood surface is not finer than sandpaper.
It made scratches which I had to undo with sandpaper again.
After which, I applied a polyurethane finish to Padauk and a wax finish on ebony.
Polyurethane does not cure on ebony due to its oily properties, wax is popular and cures well.
At first I tried to cure my finish by putting the wood in a plastic bag because I work in my bedroom and while wax is smelly and irritating to breathe, curing polyurethane is known to be possibly carcinogenic.
Unfortunately, finish cannot cure in a plastic bag because it requires free exposure to air for certain chemical reactions to take place.
So I moved it outdoors to my balcony.
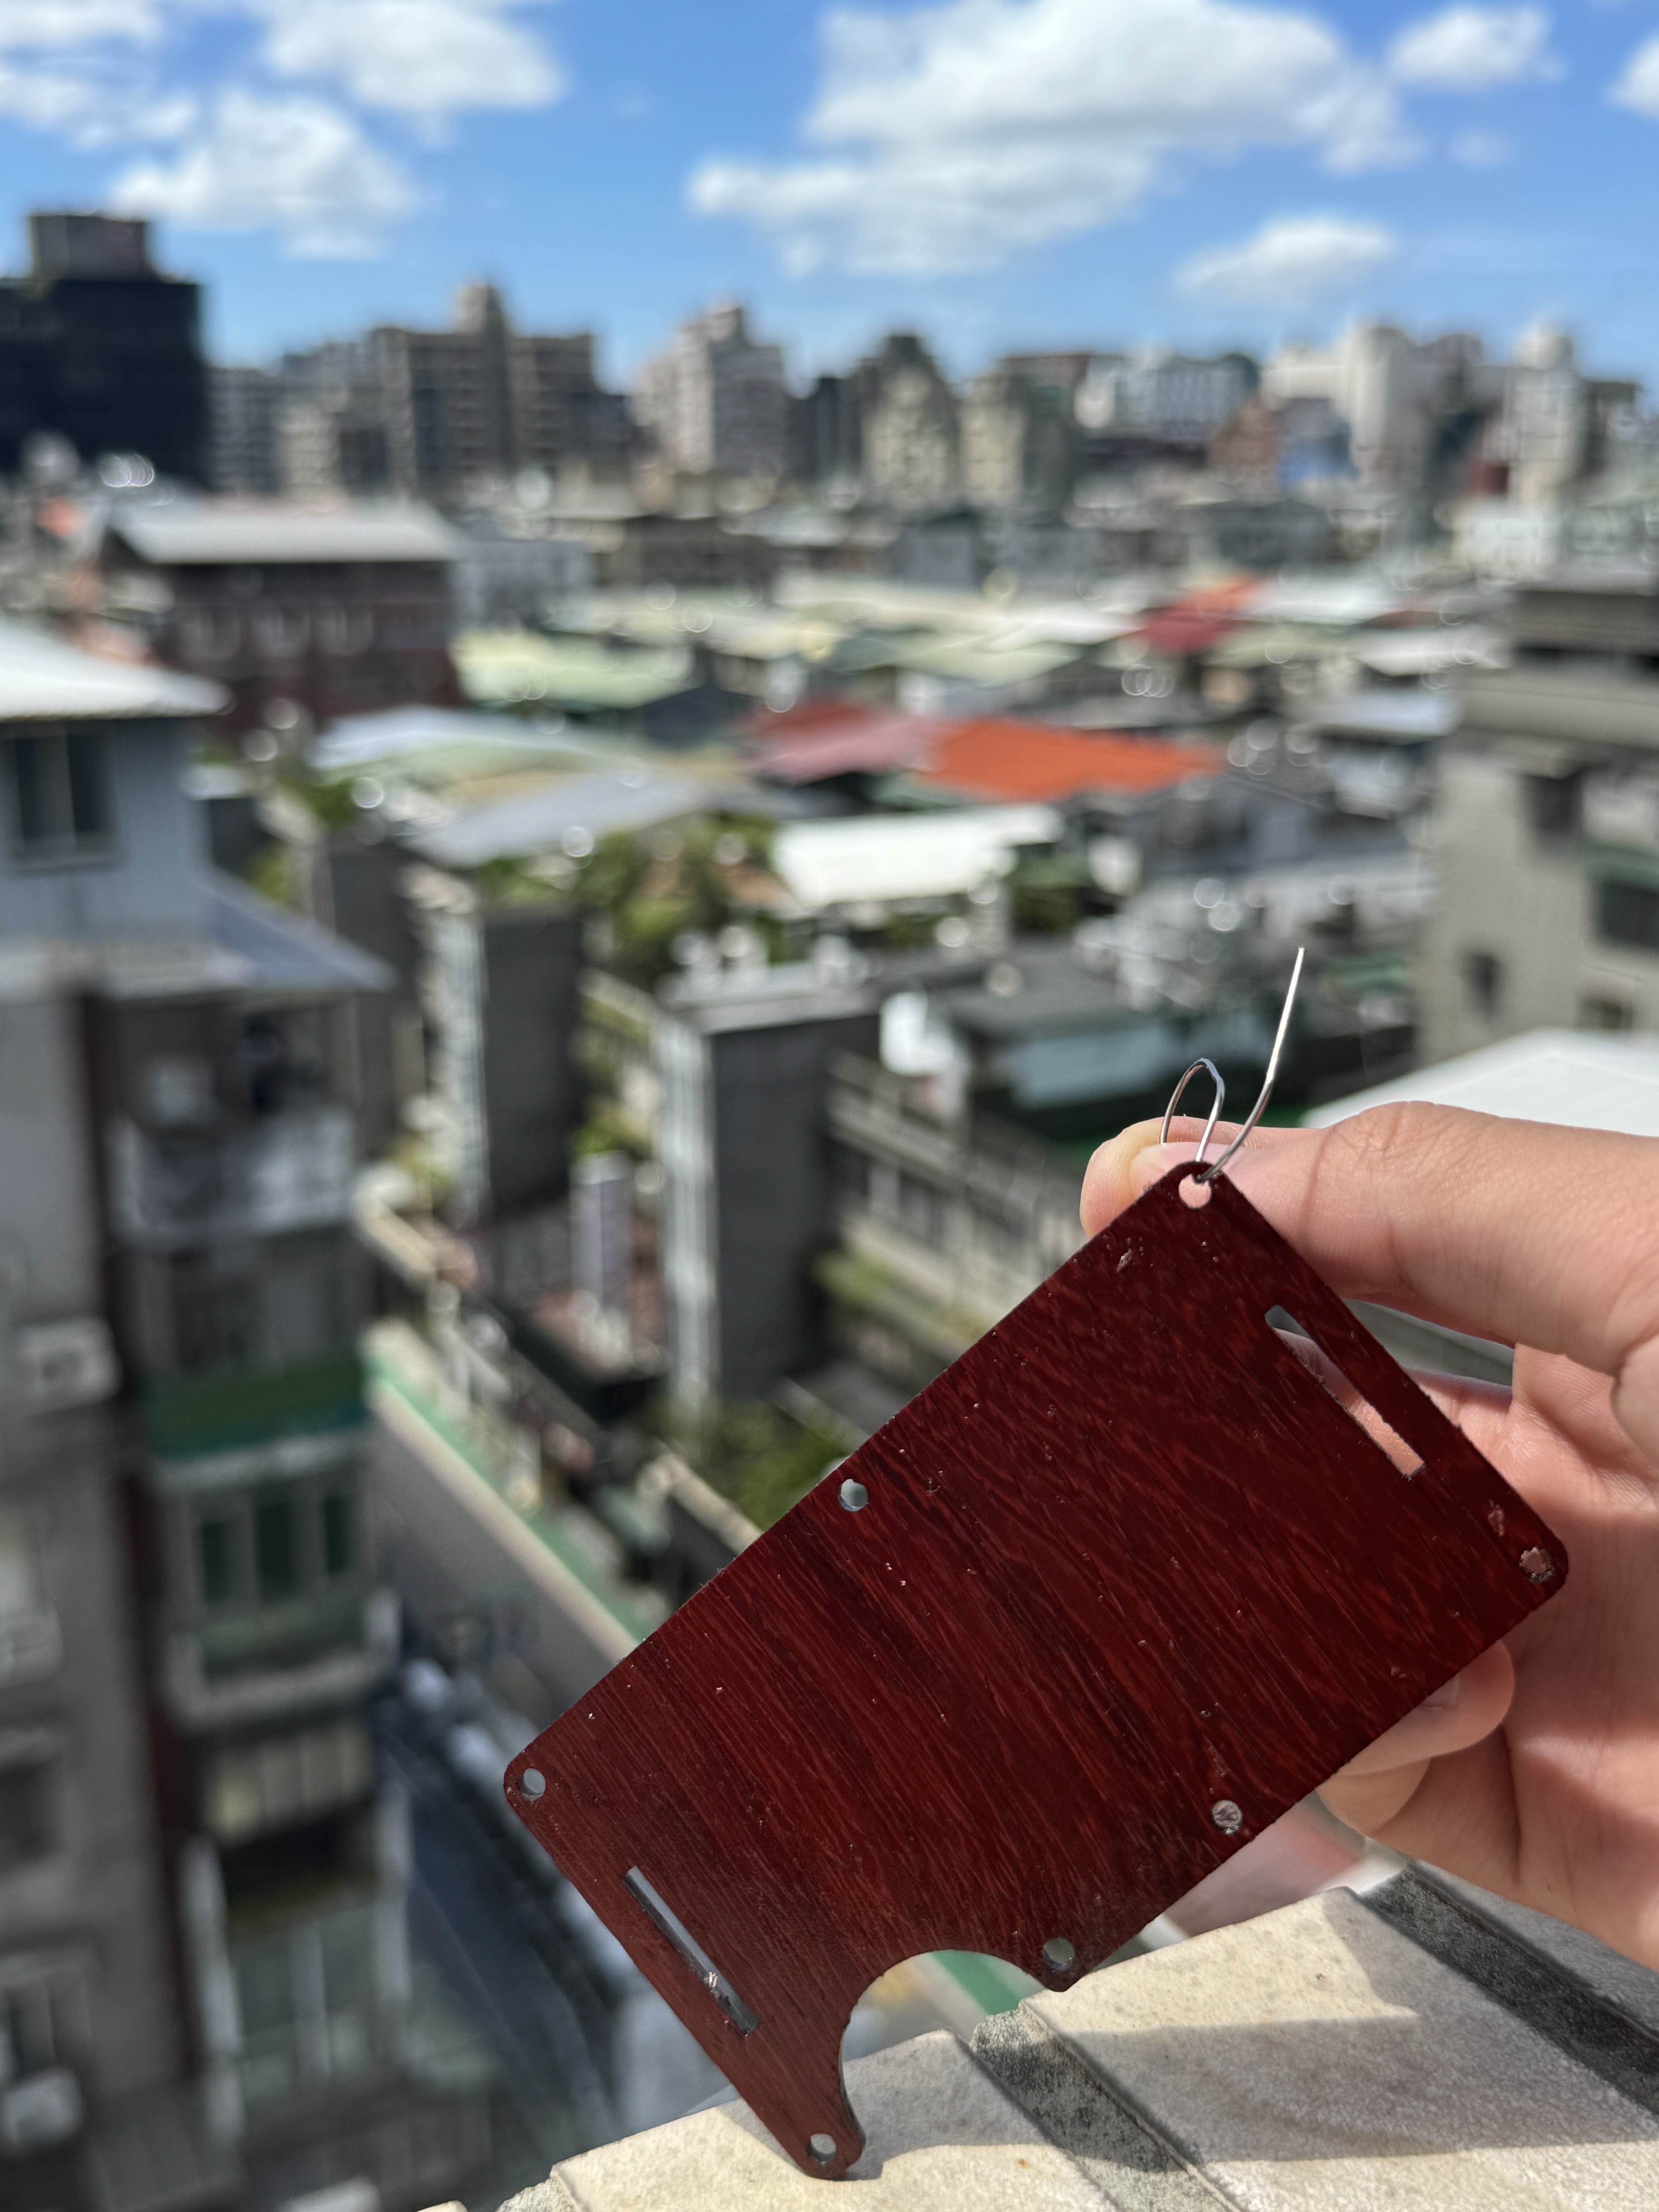 I made S hooks with some paper clips and strung them together on clothes racks. This was even better than leaving them in my room because Taiwan summers are quite hot, providing me with the optimal temperature for curing wood.
In the end, I did three coats of both polyurethane and wax.
Assembly
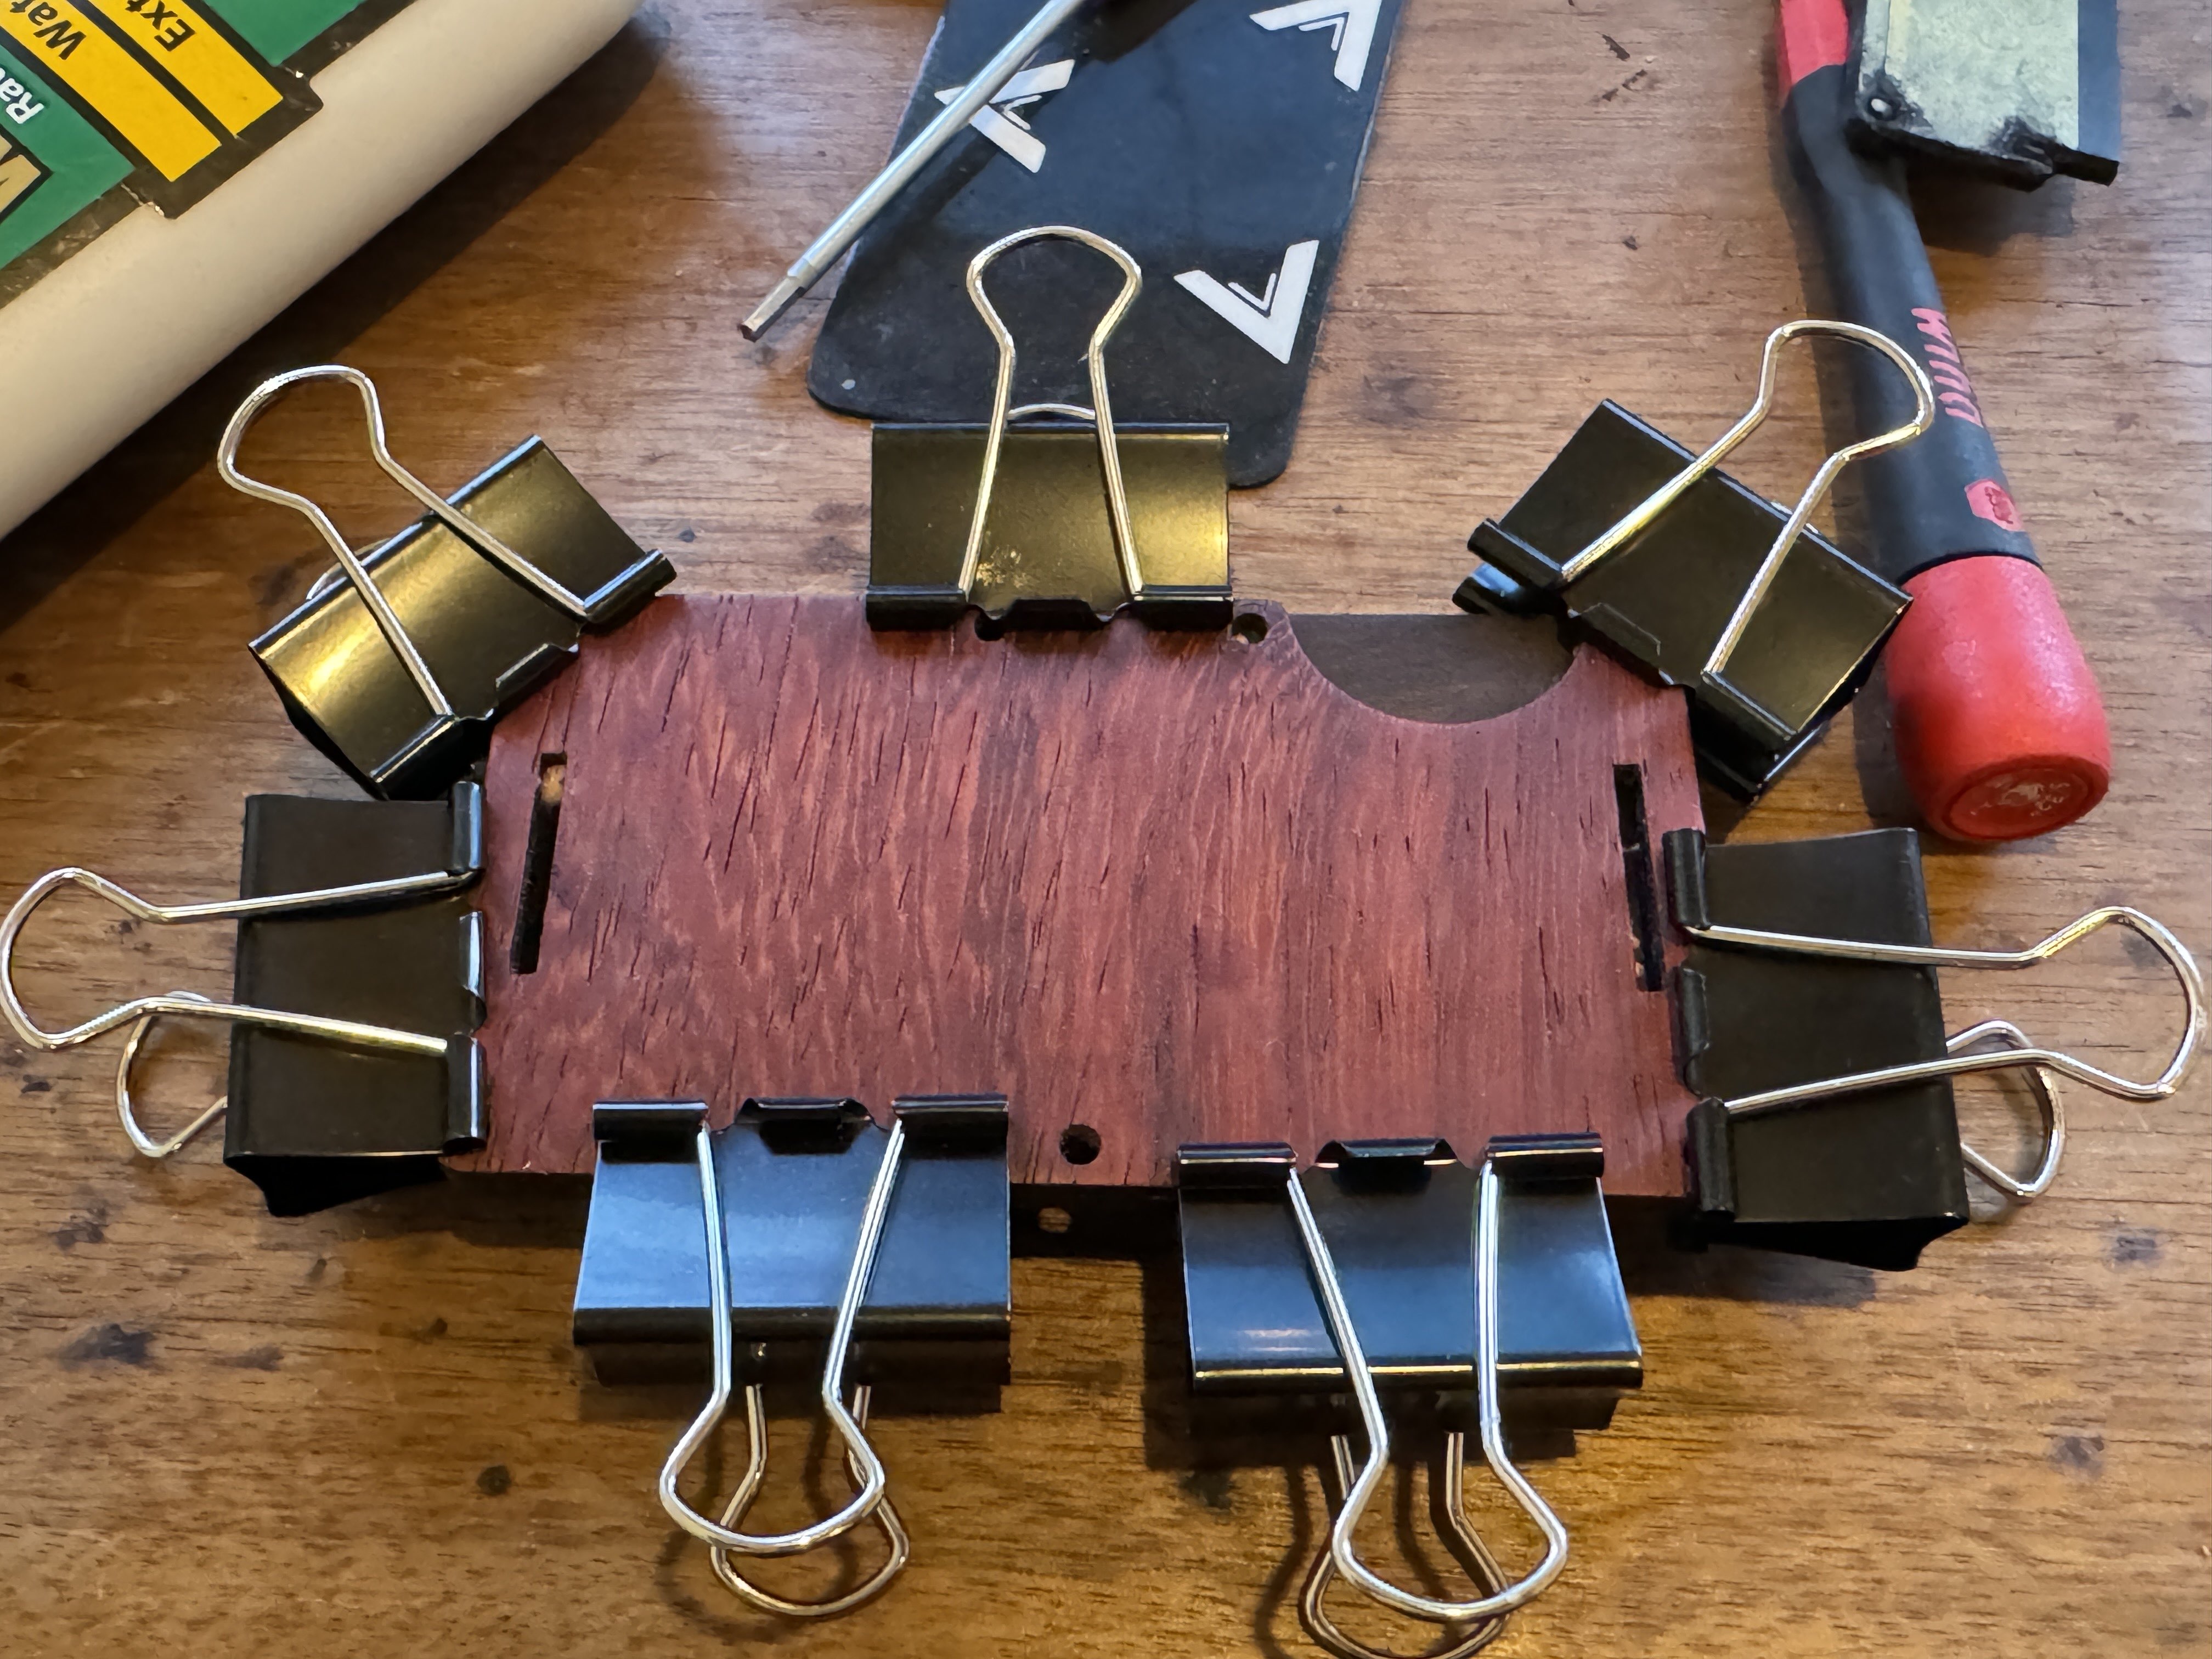
I directly glued the padauk onto the ebony to create a nice color contrast. Normally woodworkers will use wood clamps to secure wood together while the glue cures, but I’m a little Taiwanese boy who only has stationary stores within walking distance of my house. Luckily there is minimal difference as long as office paper clamps are evenly distributed among vital curing locations. After which I attached some nylon elastic belt loops I found off Ali-Express to hold the two plates together. Hand Sewn on to ensure quality and a long-lasting lifespan.
The Final Product
Pretty dope right? This is what a little more than two weeks of work amounts to. Given my knowledge now, I’m confident I can make new ones at a much faster rate at a much higher quality. I bought a lot more ebony and padauk planks expecting to make more because honestly, this project was quite enjoyable!
Custom Ebony Dice
Dice
I’m no stranger to making dice. The first time I made some was two years ago in my uncle's garage where we made multiple 60 and 48 mm dice with walnut and cherry wood respectively. He’s used to throwing around words like “差不多”(close enough) but really his work does not reflect that at all. It is perfect in any way. So I sought to challenge myself by creating a 16mm dice out of ebony, a smaller dice has more room for error, so if you drill off by even .1 of a millimeter, imperfections are abundantly clear. This was extremely difficult to make so I actually messed up several times and had to choose between restarting or settling with an imperfect dice. I did both and ended up completing two 16mm ebony dice.
Wood Choice
Again I chose ebony to use for my wood choice because it’s my favorite wood. The heavyweight density of ebony gives the wood a nice feel and the pitch black hue is my favorite. It just so happens that my wood vendor gifted me a fairly sizable chunk of Japanese Hinoki, which is white and therefore contrasts with the black ebony well. Although Hinoki and Ebony are both known for smelling really nice (I love the smell of ebony), you can’t smell either on the actual dice because I did too good of a job finishing it. Oops! Lol!
Getting it down to the Right Size
It is important to be down to the fraction of a millimeter in precision when handling something so small. This is because although changes are small, percent error is significant. Changes may not reflect visually but it has the chance of shifting the probability of rolls on each face. A good way of testing probability is by rolling the dice a few thousand or more times. If the dice is fair, then you should eventually achieve uniformity on your dataplot. So I ensured my dice was a perfect square by cutting out each side on the sawstop, allowing me to make accurate cuts.
Drilling the Holes
It’s important to be even more precise when drilling holes. This is because there is more room for error and errors are significantly more visible. To line up the holes, I sketched 2 equally spaced lines across each face and 2 equally spaced lines perpendicular to create a 3x3 matrix using measurements obtained from a caliper. From there you can easily sketch midpoints as required for 6,3, and 5. I decided to leave 1 blank because I wanted to have a special design there: the TAS logo. It just looked cool to me at the time. Still does.
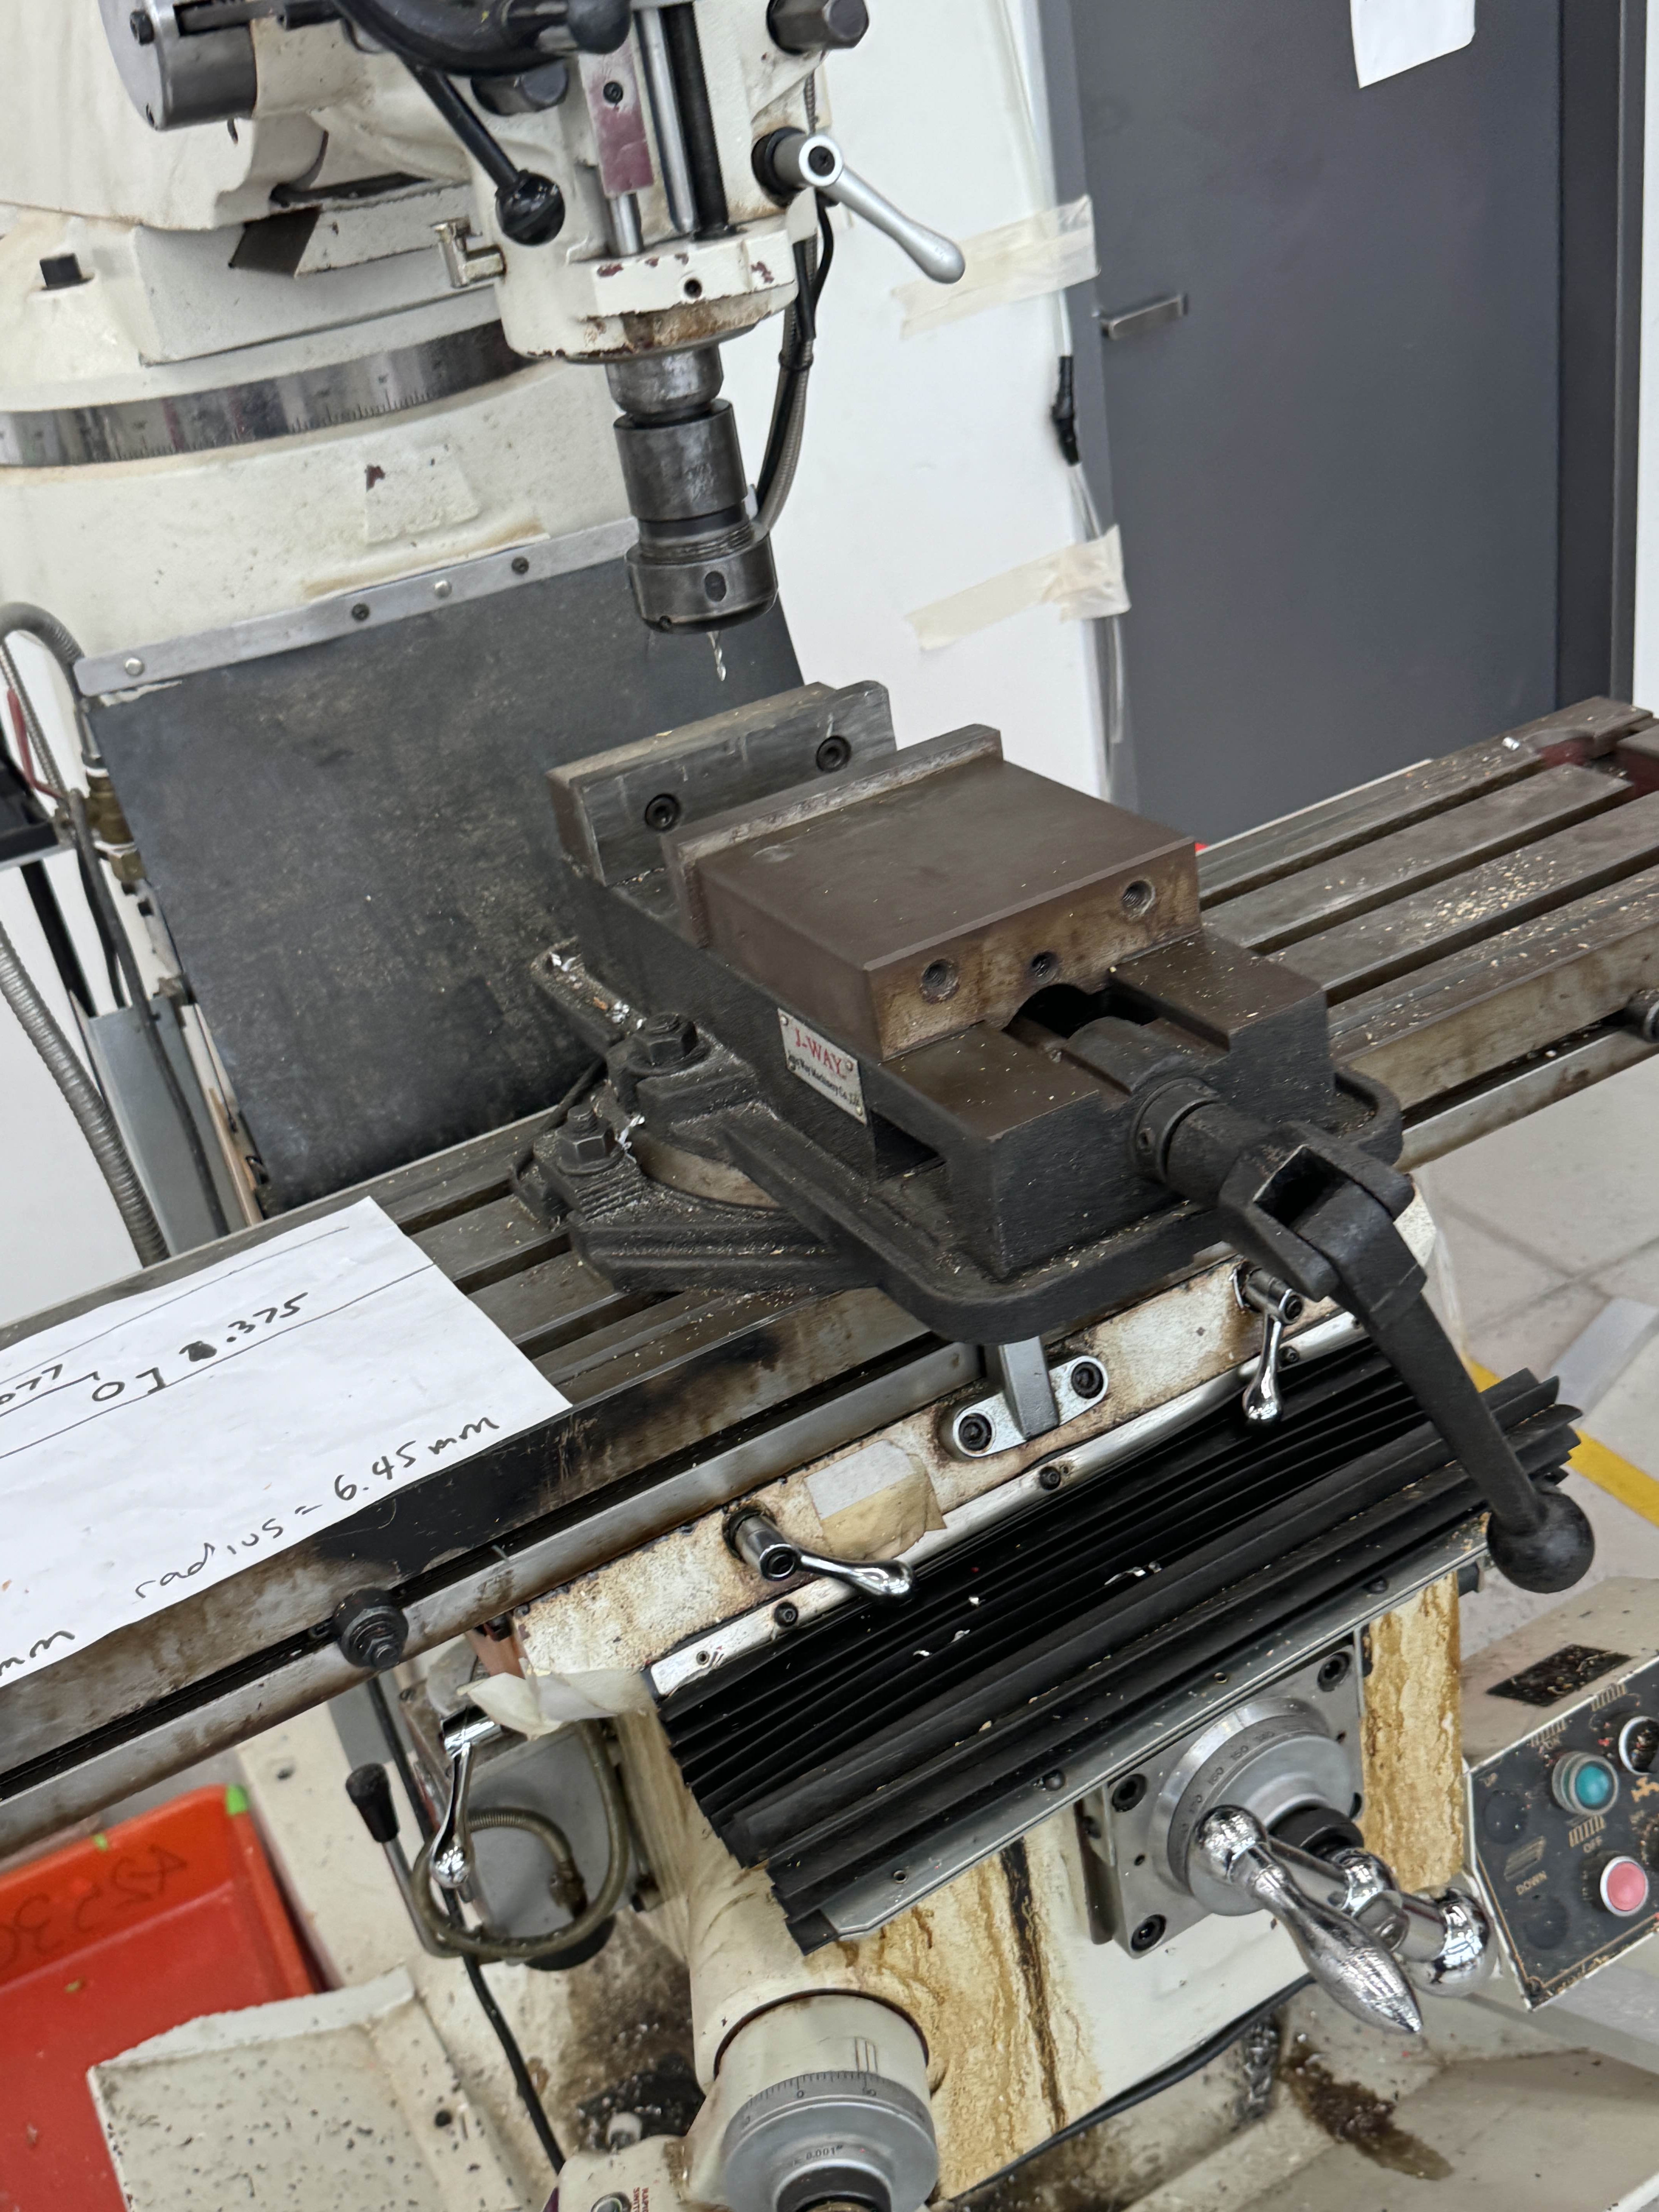 As for drilling the holes I used a manual mill. The mill has encoders that accurately provide me movement data down to .001mm and allows me to move one axis at a time. This means that as long as I get a point on a face lined up, all other points on the same face could theoretically be perfect. Attempting to make dimples with a drill press is only viable on large dice.
Inserting Hinoki
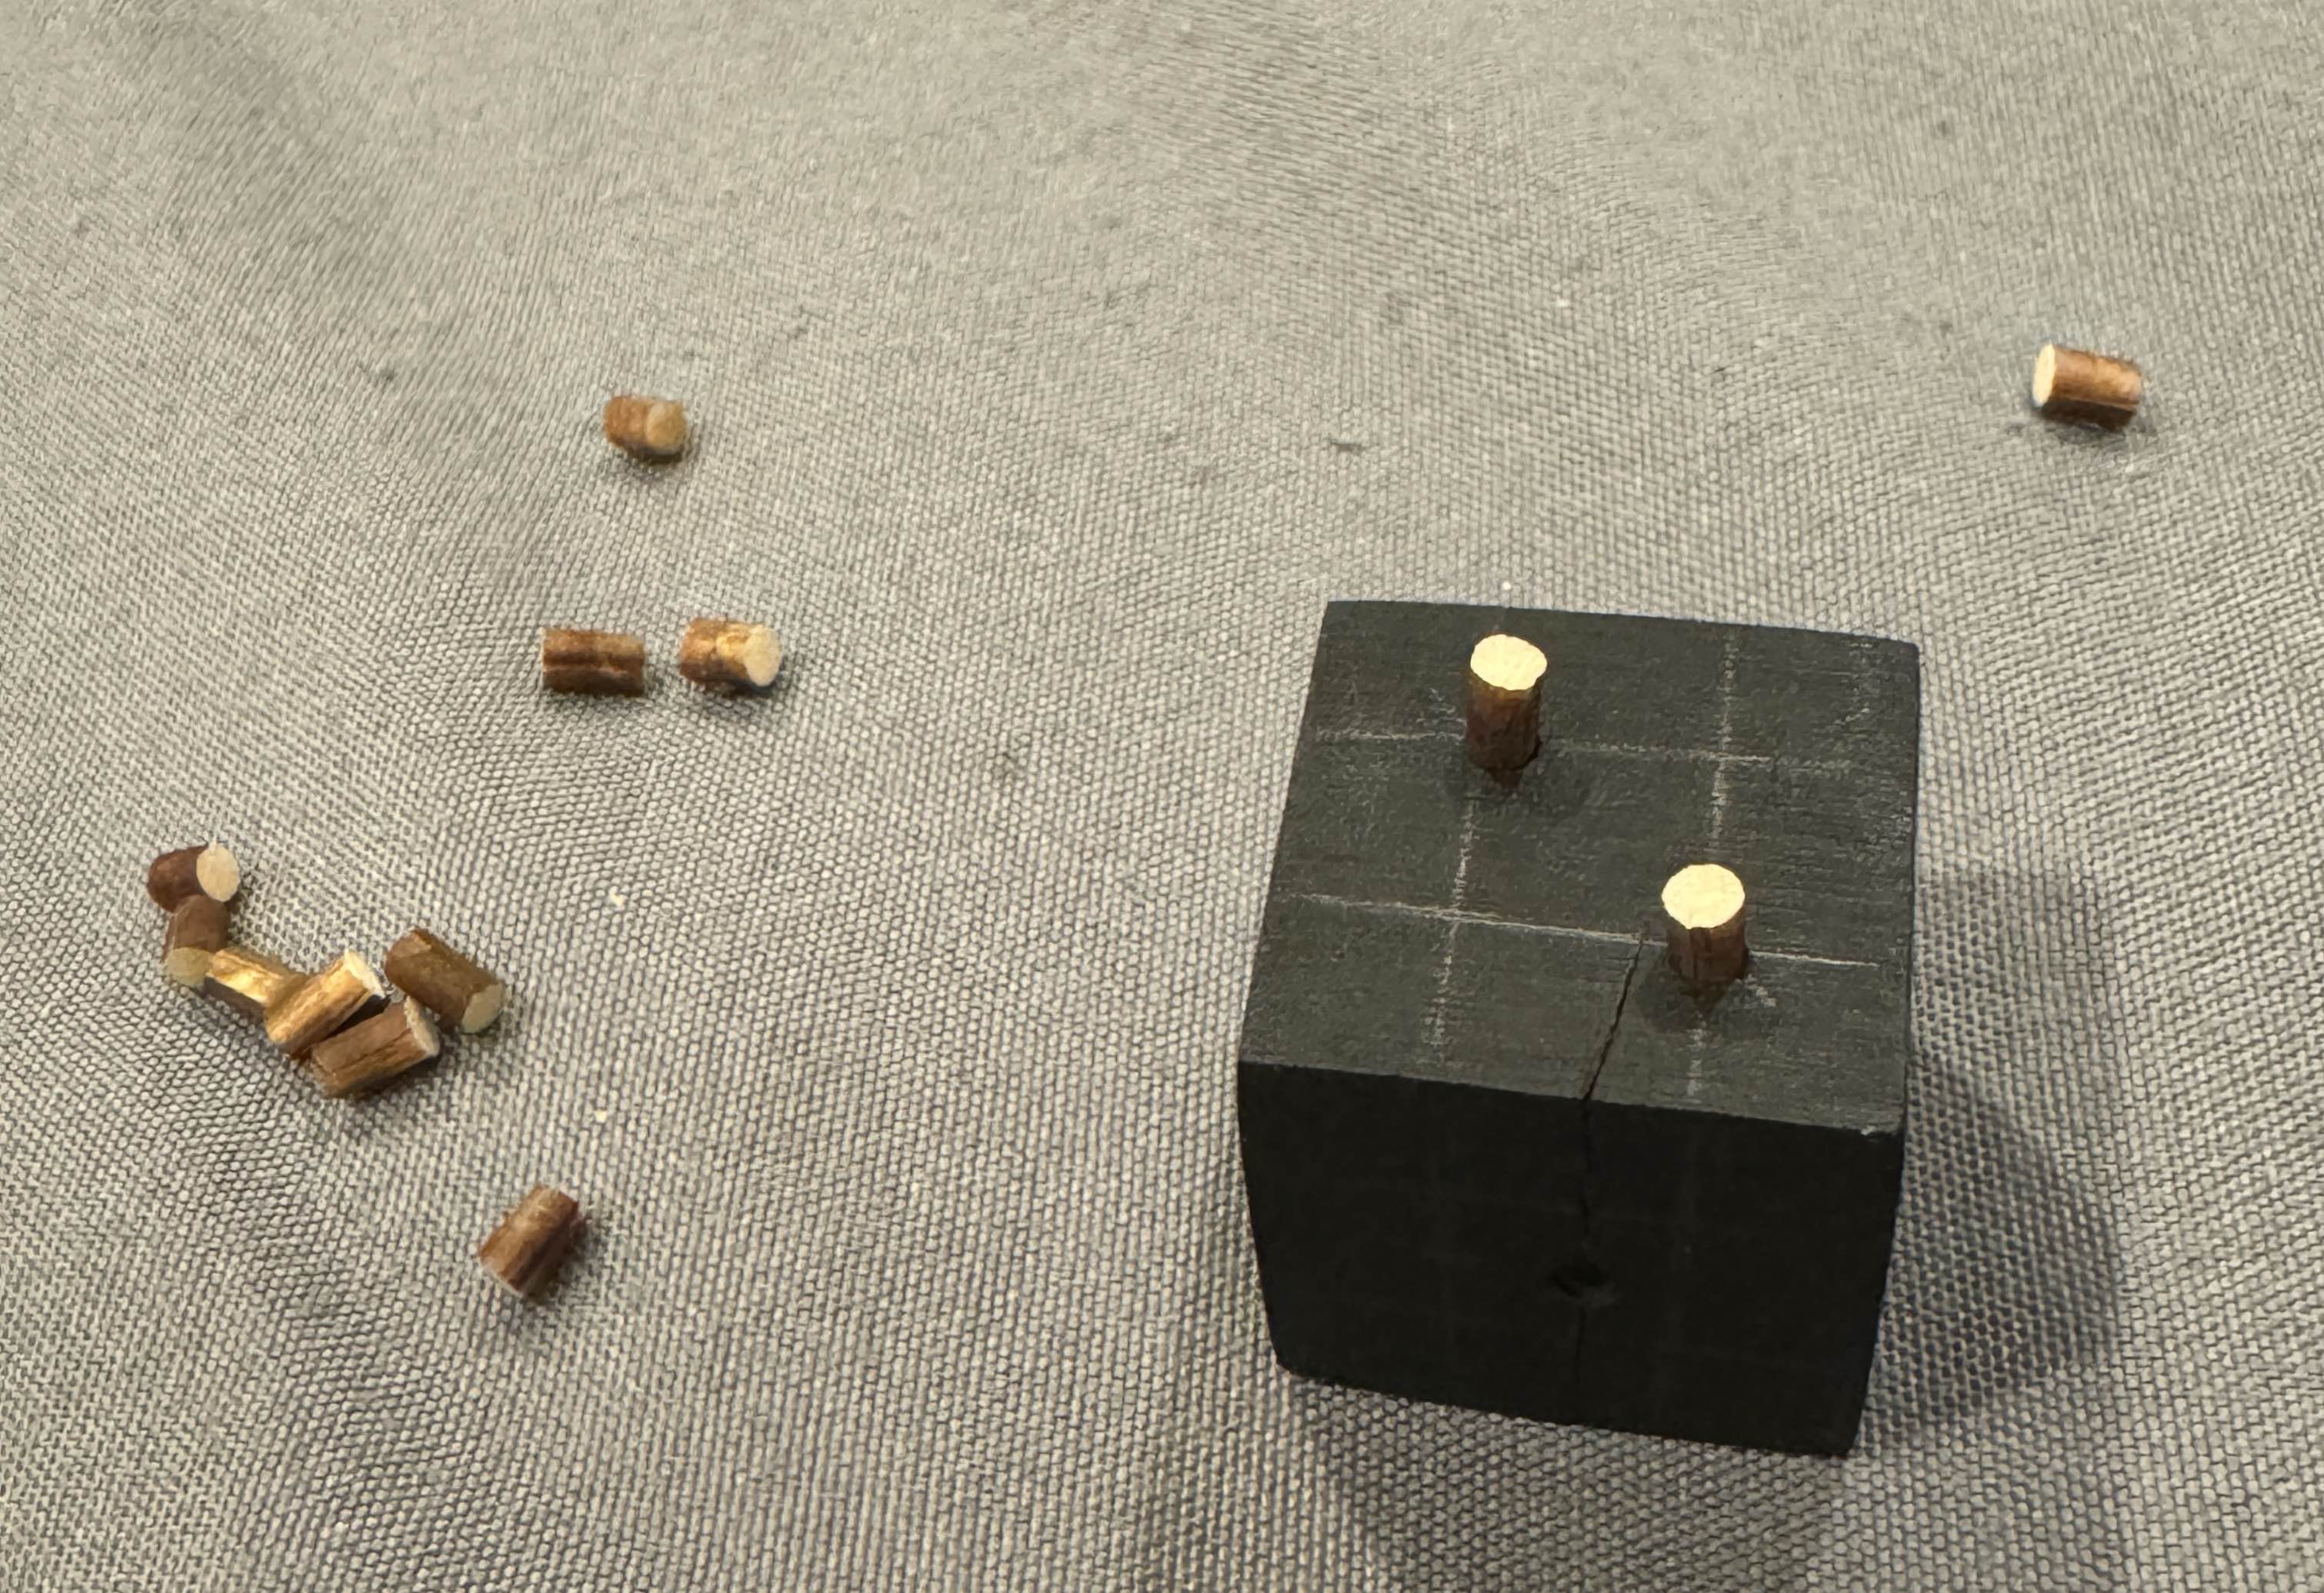
A common question I always get asked about this is “How did you get Hinoki into the dice?” Well, the dimples I drill are 2 millimeters in diameter and approximately 2 millimeters deep, so I lasercut 21 3mm long hinoki inserts of just under the same diameter for a tight fit. I reinforce this with glue so that there is no chance of them ever falling out. After which, I slice off the excess hinoki with a knife.
Finishing (get it? haha) touches
The final part of the process is sanding. I will not apply a finish this time since both ebony and hinoki woods are rot and water resistant. Added protection to the wood is acceptable but unnecessary. Instead, I sanded the wood down to 10,000 grit for the shiniest finish in the west. The sanding sequence is from 120,150, 220, 320, 400, 800, 1000, 1500, 2000, 2500, 3000, 4000, 5000, 7000, 8000, 10000 You will not find a shinier natural black 16mm dice, I can guarantee that. Oh, I also rounded the corners a little bit because it makes the dice look and feel a lot better!
Conclusion
First thing’s first, I would like to give my wood vendor a shoutout. Wood in Taiwan is scarce. Any kind of wood you want will have to be imported. Even Hinoki, because the logging of Taiwan’s 國寶(national treasure) is outlawed. Nations that used to export wood such as Burma (Myanmar) are now restrictive. This makes obtaining wood in Taiwan harder than ever. I’ll go ahead and say that there is one clear best wholesale wood vendor in Taipei: 青松木業公司. The staff are very friendly, they have beautiful selections of wood, and they’re always importing more. By far my most favorite store in Taipei. I would consider it a woodworking enthusiast’s paradise with selections that rival that of Rockler’s.
Okay, now that that’s out of the way, woodworking this year has taught me so much about life. This may sound silly, but I spent two whole months doing woodworking projects and I do not regret a single moment of it. Woodworking has taught me two things that I have been lacking for years: patience and appreciation. Firstly, doing woodworking with hardwoods like ebony forces you to slow down. For if you work too fast you crack the wood and have to restart. You are forced to take the slower and more precise methods of subtractive manufacturing save you want errors on your final product. Initially I moved crazy fast because I wanted to continue meeting impossible deadlines early as I have always done in the past, but this resulted in material waste, burns, fractures, and me having to start over. Moreso, after I finish my work I look upon it and criticize it for its imperfections. Seldom would I know, a lot of people actually prefer imperfections. This refuted my belief on objective beauty and objective failure- for beauty truly is just within the eye(s) of the beholder.
Storefront
I bulk ordered a lot of things to save on shipping and I’m more than happy to share some for a fair price. Dice and ridge wallet as shown above are custom made-to-order upon request with customizable engravings, wood selections, and sizes. These are all hand-made, so each dice/wallet takes me about 4-8 hours across several days. Here are my offerings: